

How To Use Textures In Photoshop With Flowers
Texture, Deckle and Float Your Bloom Images!
Past Christine Pentecost—
Living in Montana, where the winters are long, I decided to give myself a photographic claiming, so I could enjoy my flowers year round. I wanted to photograph fresh bouquets of flowers, but in a fashion that I could have unique backgrounds, which could easily be changed. I too wanted a new way to present them at the many shows I exhibit at.
© Christine Pentecost
Hither'due south an overview of three techniques to make your flower images really stand out: Texture, Deckling, and Floating. You can observe links to detailed step-by-step tutorials in the Resources department at the finish of the article .
First, let's discuss textured backgrounds. I accept always admired images with these backgrounds, and fortunately, with Photoshop and blend modes, information technology'southward hands done. And, while I piece of work in Photoshop CC, blend modes are also available on Photoshop Elements and other imaging programs.
I started this projection final leap, when tulips and daffodils were first available in the stores. I progressed to visiting our local Farmer's Market every week during the summer months, where at that place were some wonderful blossom vendors. Of course y'all can besides get flowers in the wintertime from florists or fifty-fifty abound your own, so you tin can use this technique year-round.
The more I got involved in the project, the more ideas I came up with for my flower displays, vases and containers. I started out with simple glass vases, but constitute more than unique ones online, at my local arts and crafts shop, and antique stores. Later all, it doesn't have to be an actual vase!
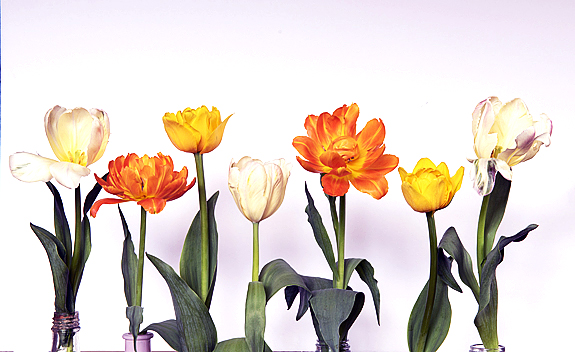
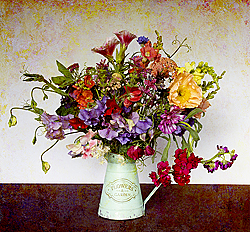
Original un-cropped image on white background before adding texture and other enhancements. © Christine Pentecost
The process is relatively simple. I suit the bouquet in my bloom vase, setting the vase on either a brown base or crude wood lath, and so identify a large white piece of mat board or foam cadre behind the flowers. Sometimes, equally shown above, I'll utilise several vases. I employ natural lighting, and photo my flowers both inside and outdoors.
I brand a point of not being in direct sunlight, to prevent harsh shadows. However, fifty-fifty when using natural light, there tin can be shadows on the white background, so I keep several inches (or more than) betwixt the bouquet and background, to eliminate them. I also position my camera at the same level every bit the bouquet, using a tripod. Sometimes I identify a few flower petals or flowers around the base of the vase, and I like to rearrange the flowers every bit I take the photos, so I accept many different perspectives to cull from.
Now the fun begins. Subsequently taking the photos into Photoshop, I crop the image, to the perspective I desire, whether information technology exist rectangular, or foursquare.
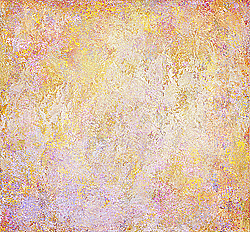
A typical textured backgrounds. In that location are hundreds to choose from or brand your own.
My technique involves using textures, which can exist found in abundance online, many of them free (see Resources, beneath). Or you can photo or scan your ain textures, if you'd similar. And so, use the blend mode features in Photoshop, which is very like shooting fish in a barrel. Kickoff, pick a texture that you like, open information technology in Photoshop, and drag the layer onto your flower prototype, using the move tool. Y'all may need to do free transform (Command "T" on Windows, Control "T" on a Mac) to make the texture fit your image.
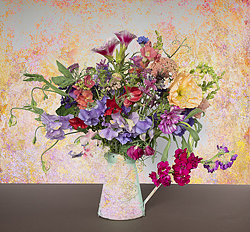
I variation shows texture overlaying the image. © Christine Pentecost
Side by side, click on the Blend Mode drib down box. In Photoshop, you will see a long list of all of the blend modes available. As you move your mouse down the listing of blend modes in most imaging applications, the composite appearance of your image will change. Another quick and like shooting fish in a barrel way is to click on the Move tool (or "Five" every bit a shortcut), and then click on the Plus (+) or Minus (-) keys to scroll through the many blend modes. I don't similar every texture I try, so there is a lot of trial and fault with unlike textures, colors and alloy modes.
This variation is more subtle. All easy to preview until you observe your favorite. © Christine Pentecost
Sometimes, the texture looks neat on the background, but non on the flowers. Other times, I like adding texture to the flowers, but non the groundwork. To practise this, I create a layer mask on the textured layer, allowing me to remove the texture where I don't want it. You may also want to adapt the opacity of the blend mode (lightening or darkening it) to achieve the look you want.
There are no set up rules virtually how many layers you can have. I've created my perfect prototype in but a few layers, and I have other images where I used 13 layers! Normally the final step in my textured prototype is to add together an border overlay, which creates a darker edge around the paradigm.
When I finally have my paradigm as I like it, I print it onto a textured paper. My favorite the nice, heavyweight, Red River Palo Duro Etching 315, which gives the last printed prototype even more texture. I've also used River Linen 2.0, which has a nice texture, and is a good option if your printer is unable to impress heavyweight papers. (see Resources, below.)
Now for the next step. Later the photograph is printed, I make a deckled edging, using the Dual Border Ripper Classic. This is bachelor from Reddish River and you should watch the video on their site earlier doing your first deckled edge. (see Resources, below). After watching them, I institute it very easy to create this unique edge which gives my blossom images a archetype look.
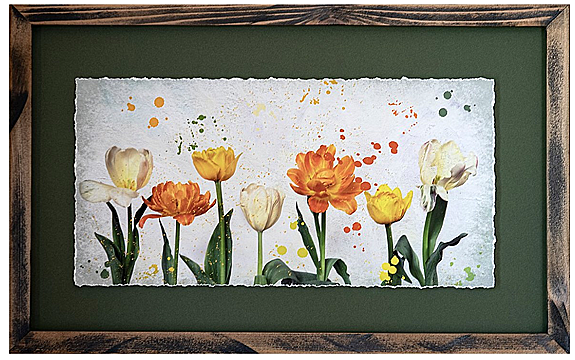
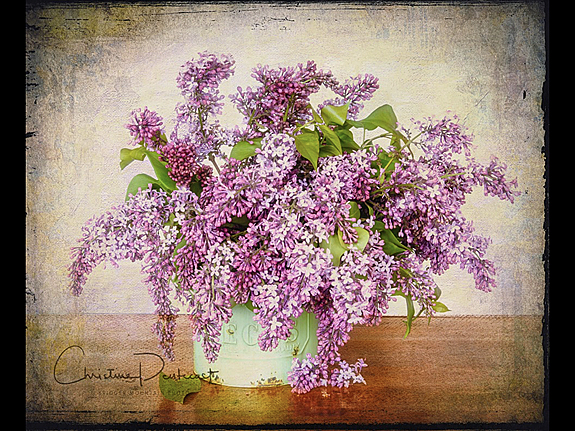
Final cropped image with textured background, deckled edges and floated in a frame. © Christine Pentecost
Finally, when framing my bloom photos, I similar to create the look of a floated prototype. I first cut the matte lath to the size of the backboard of the frame. And then, I cutting a piece of acrid-costless foam core about 1/four to ½ inch smaller than my epitome, after which I either record or glue (with adhesive spray) the image to the matte lath. Bear in mind that the frame will need to have a deeper depth, or "rabbit", to allow for the floated print. (see Resources beneath)
One time you get into using textured backgrounds, it can exist addictive. I found using them really enhances the appearance of my flower images and elevates them to a new loftier, especially when their edges are deckled and they float in their frames. Bank check out the tutorials below and so get cracking. It'll make those winter days fly by.
RESOURCES
Visit Christine's website to see more of her textured bloom images.
Tutorials
Quick kickoff texture tutorial
Dual Border Ripper tutorial
Making Floating Images tutorial
Textures that go well with flowers:
https://frenchkisstextures.com
https://photomorphis.com/
http://flypapertextures.com
Best Red River Papers for textured flower photography
Palo Duro Carving 315
River Linen 2.0
Subscribe to Reddish River Newspaper's Newsletter f or Great Deals!
YOUR COMMENTS ARE WELCOMED BELOW
Source: https://blog.redrivercatalog.com/2020/02/texture-deckle-and-float-your-flower-images.html
Posted by: lavalleydespassoling.blogspot.com
0 Response to "How To Use Textures In Photoshop With Flowers"
Post a Comment